Task Analysis of Laparoscopic Splenectomy
Dr. Nada Aziz

PROCEDURE STEPS:
- Patient put under general anaesthesia .
- Patient preparation and positioning.
- Surgeon, patient, and monitor should be at coaxial alignment.
- Establishment of the access by Veress needle.
- Gas insufflation with CO2.
- Ports insertion.
- Surgical steps.
- Specimen retrieval.
- Ports closure.
- Deflation of the abdomen.
- Skin closure.
- Patient extubation.
Executional steps :
- General Anaesthesia :
- The Patient should be under GA.
- NGT to be inserted and suction of gastric contents.
- Position the patient in a supine position.
- Availability of the following instruments should be checked :
- Access instruments: Blade 11, Veress needle, one 10 mm port, two 5 mm ports.
- Optical instruments: 10 mm telescope, camera, light cable.
- Operating instruments: Maryland, semi-traumatic grasper, endo-GIA stapler, endoclips, Curved end scissor, endobag.
- Energy instruments: Harmonic.
- Check the function of the monitor, insufflator, light source, amount of gas cylinder, harmonic setting frequency between 3-5, and check the monopolar function for cutting and coagulation.
- Patient and surgeon Positioning :
- Table height should be adjusted to the surgeon height (0.49 X surgeon height).
- The patient should be prepped form the nipples to the mid-thighs. Patient draping and cable arrangement.
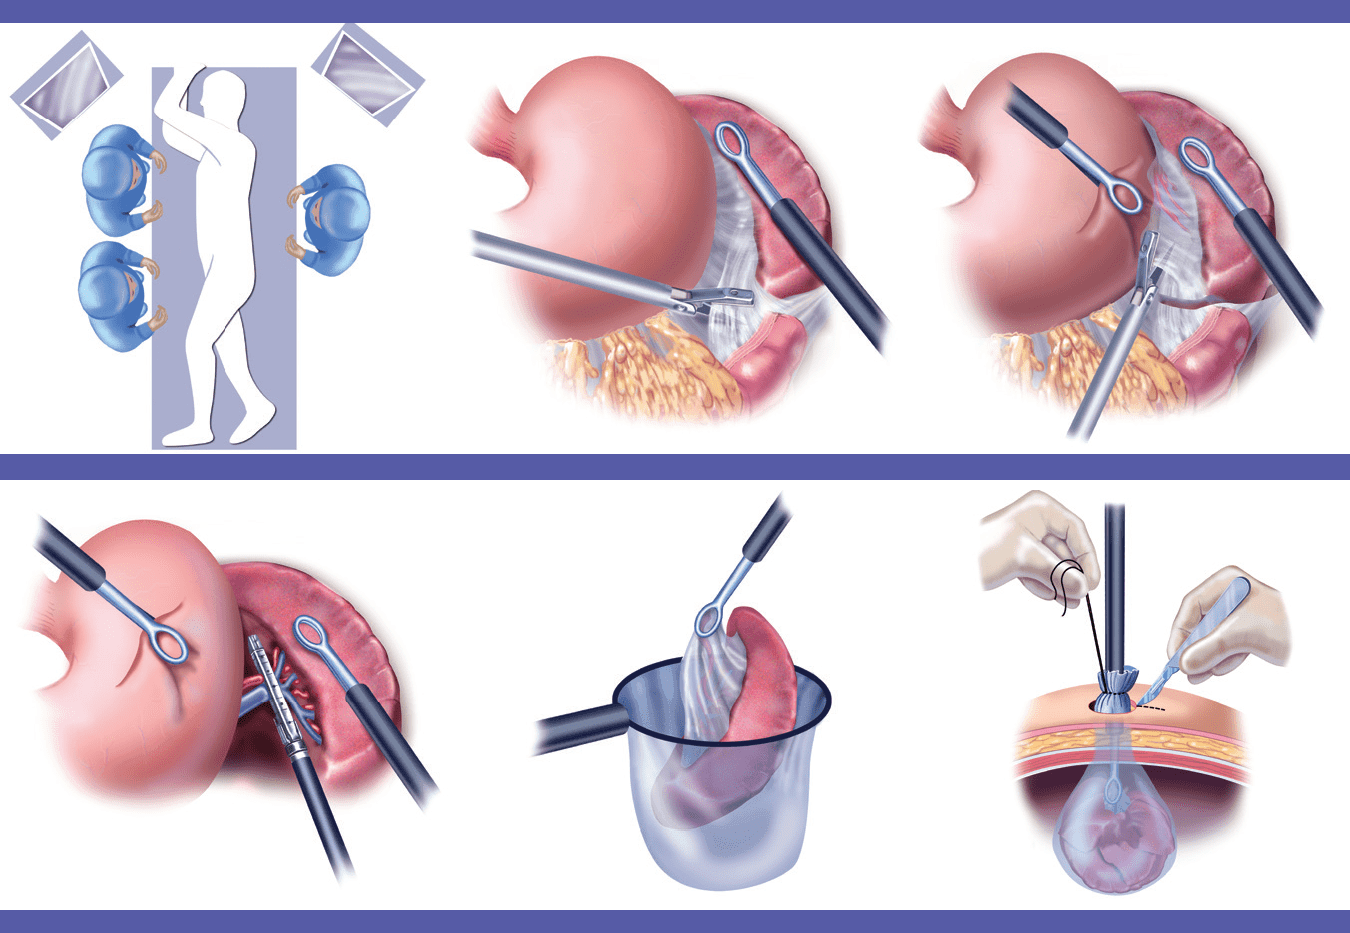
- The surgeon should stand at the right side of the patient, the monitor at the left side of the patient
- The monitor, target organ and surgeon should be aligned in coaxial alignment.
- The monitor should be at 15 degrees below the surgeon eyes and 5 times of its diagonal diameter away from the surgeon.
- Access and Insufflation:
- Position the patient in right lateral decubitus with blankets put between the chest and the pelvis to elevate the area between the ribs and pelvis to have more visualization of the spleen.
- With 11 blades a 2mm incision is made at 10 cm lateral to the umbilicus midclavicular line a Size 10 Veress needle is inserted perpendicularly to the abdominal wall: starting with checking the veress needle function and patency by flushing it with NS and hearing 2 clicks of the valve.
- The length of the needle which should be inserted should be 4cm + abdominal wall thickness. Veress Needle should be held as a dart at 90 degrees. Will feel 2 areas of resistance, should be intra-abdominal after you passed the 2nd area.
- Check the position of the Veress needle by 3 ways:
- Flush the needle with NS which should go easily.
- Aspirate, nothing should come.
- Hanging drop test: drops of NS are placed at the cannula of the needle, should sink when the lower abdominal wall is lifted.
a.Set pressure 12 and flow 1 L / min.
6. The gas tube should be flushed with CO2 before attaching it the veress needle.
7. The gas tube to be attached to the veress needle and start insufflation, making sure that the abdomen is tympanic and distended equally in all quadrants. Insufflators parameters should be observed carefully during insufflation.
8. Once the actual pressure reaches the set pressure of 12 mmHg, Veress needle will be removed.
9. At the verses needle insertion wound, it is increased to 10mm.
10. 10mm port is inserted and attached to the gas tube.
11. 30 degrees Camera to be adjusted in terms of white balance, and focus.
12. Camera to be inserted and check for any bleeding, adhesion or bowel injury. Determine the spleen hilum
- Working ports insertion :
- Based on baseball diamond concept working ports sites are determined after visualizing the hilum and two 5mm ports are inserted under direct visualization to be contralateral in their position.
- Liver retractor can be added at the epigastric area if needed
- Surgical steps :
- Determine the splenocolic and phernocolic ligament and both of them will be dissected using harmonic starting with splenocolic.
- The lower part will be mobilized and the spleen will be lifted up. The hilum and short gastric will be exposed
- Using harmonic the short gastric (gastrosplenic ligament) are dissected and separated from the spleen.
- Increasing one of the 5mm ports to 12 mm to insert an endo-GIA stapler.
- After inserting the endo-GIA, the splenic hilum vessels which include the splenic artery and vein are ligated using it. (It is preferred since the vessels lie parallel to each other, so the chance of AV fistula is less)
- After the hilum vessels are ligated the phernosplenic ligament is dissected and the spleen is freely mobile in the abdomen
- Ensure that hemostasis is maintained.
- Using the 12mm incision a size D Endo bag is inserted and the spleen is extracted through it. (If needed the spleen can be morcellated inside the endo bag using sponge forceps)
- Ports removal and closure:
- Under direct vision, the 5mm port is removed.
- The 10mm and 12 mm incisions facia is closed using Vicryl 0 by suture passer.
- Gas insufflation is stopped, the abdomen is deflated
- All Skin incisions are closed using Vicryl or staplers